How to Make Apple Pie Pops with colored icing
September 21, 2011 by ThePartyAnimal
Filed under Uncategorized
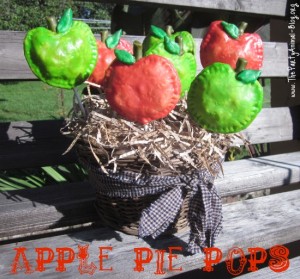 If you love Apple Pies then you will definitely love these Mini Apple Pie Pops. They are a fun EASY treat to bake up and the kids love them. A perfect treat for your Fall Festivities.
I had so much fun making my Pumpkin Pie Pops the other day that I had to create some Apple Pie Pops. Being I am not a big fan of Pumpkin Pie and I made those with my hubby and son in mind, it was my turn to make a treat that I would love. Now I am a fan of Apple Pie !!
These Apple Pie Pops were a HUGE hit with not only myself, but also the hubby and the kids. They reminded me of Hostess Apple Pies that I would load up on as a child when I would go shopping with my dad to the Hostess Outlet as a child. They have that yummy Apple Pie filling with a Sugar Shell on the outside – the perfect balance of YUMMINESS.
These were really EASY to make and I am going to show you how I did it Step by Step. So if you are going Apple picking this fall – you better grab an extra bushel for these treats.
Here is what I used to make my Apple Pie Pops:
- Pillsbury Refrigerated Pie Crusts
- 1 Can of Apple Pie Filling (I am all about easy !!)
- 1 Egg White (used for a wash on the Pies)
- Popsicle Sticks or Lollipop Sticks
***Note: You can make your filling anyway you like it using Fresh Apples or the Canned like I did – choice is yours, I went the quick and easy route.***
The Icing:
- 1/2 Cup Powdered Sugar
- 1 – 2 Tbsp Milk
- 1 tsp Vanilla
- Food Coloring Gels (see in directions below)
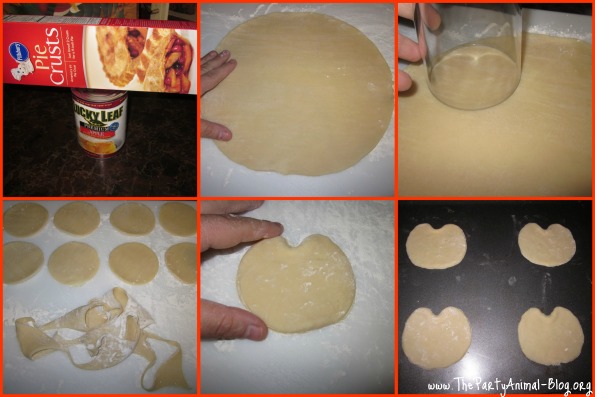 I gathered my goods and was ready to make some Apple Pies !! So here is what I did. First I rolled out one of the Crusts onto my floured surface and cut out circles using a glass. I was able to get 8 Circles – so that would be 4 Pies from one crust. Since there are 2 in the package I had a total of 8 Pies in the end, but you can get maybe 9 or 10 with the excess.
To get more of an Apple Shape I placed Top and Bottom together and pushed down the middle. Then I placed the bottoms on my cookie sheet. You can use an Apple Cookie cutter for the shape, but I did not have one nor did I find it necessary.
![]()
 Next I took some of excess dough and rolled a snake and cut that into my stems for my Apples. I also created some leaves using a knife – EASY Peasy !!
![]()
 Time for the Assembly. First I put my can of Apple Pie Filling in a bowl and cut up the apples smaller. I added a tiny bit of sugar since I find the Apple Pie Filling in the can can be a bit bitter. I did not want to sweeten it too much because the Sugar Icing balances that out.
So I added a blob onto the bottom crust. Then I added in my stem – make sure it is in there and just press down the end. Next I added my Lollipop Stick. Note: On my second batch I added the stick before the filling and took an extra piece of dough and placed it on top of the stick so it would be more secure after it is baked. You can even leave out the stick all together if you want – that is up to you.
Then I just placed my top crusts on and closed them up with a fork around the edges. At this point if your Apple is to0 round – just use your fingers and reshape it.
![]()
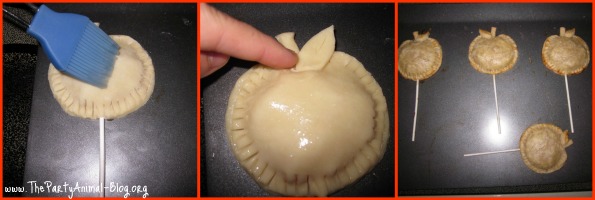 Next I brushed on some Egg White and then attached my Leaves. Make sure when adding your leaves to alternate them – you do not want them to all look exactly the same.
Once that is done off in the oven they go. I baked mine at 350 for about 12+ minutes or until they got a golden brown. Now the Apple Pie Pops look adorable right out of the oven and you can leave them just like that, but for me I like to add color and pop and the icing not only does that, but it also gives it a nice sugary coating.
Let Cool before icing.
![]()
 So while my Apple Pies cooled I mixed up the icing. Just Mix your Powdered Sugar, Milk and Vanilla. Then I separated it to be colored – I had a bigger bowl for the Red & Green Color and a smaller amount for my Leaves & Stems.
I used a Red Food Coloring Gel for the Red Apples, for the Green Apples I used a Green with a dash of Yellow. For the Leaves I used a Green and for the stems I used a Tan with a dash of Black added in.
Then it was time to paint my Apples. I use a clean Paint Brush to do this – it is easy and you get a nice even coat. To make it easy first do all the Apples Red, then do the Leaves and last do the Stems. Repeat with the Green.
That is it !!!
![]()
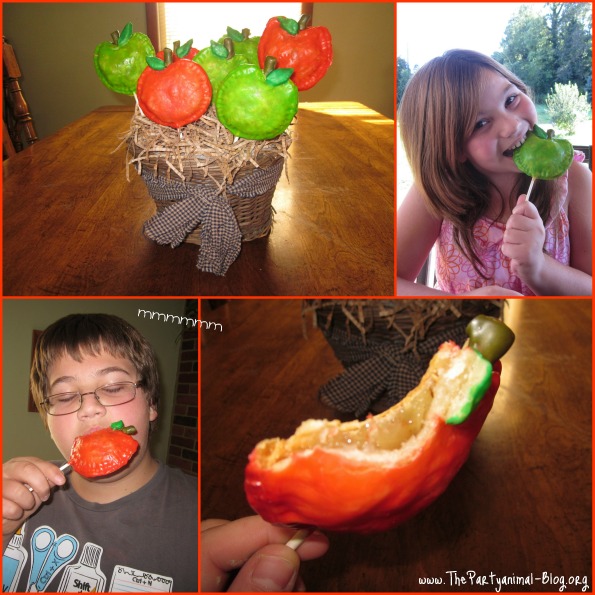 I placed my basket of Apple Pie Pops on the table and within minutes they were gobbled up. Look at my son – he was in heaven – lol. The kids said these were the best and I agree, so did the hubby.
They are a definite do over !!
These would be great at your next Fall Party and you can even package them up using a clear baggie and ribbon to send to school for the class or even better for your next bake sale.
I also think they would be a great idea for a Teachers gift don’t you?
I am having way too much fun with these Mini Pies – Now what will I do next? Stay Tuned….
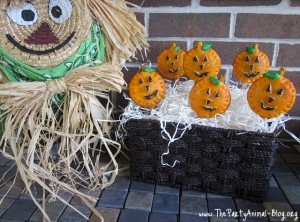
Be sure to check out my Pumpkin Pie Pops:
Click on the Photo


Super cute! I love these for fall.
I think I’ll try these for our Halloween party. I bet your kids really love that you make all of these recipes for your blog! They get to eat all kinds of yummy stuff! 🙂
I LOVE THESE!! You are such a homemaker, Nicole!!