My Elf on the Shelf inspired Cookies
November 26, 2012 by ThePartyAnimal
Filed under Cookies
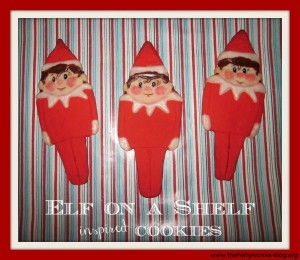
 Oh that mischievous little Red Elf on the Shelf inspired me to make some fun Elf Cookies. Even though they may not look exactly like him he was who inspired this SWEET creation.
The Elf on the Shelf and Story![]()
has been around for quite sometime now, but in the past couple years it has gained tremendous popularity. It seems one of these little elves even moved into my home this year and is doing some crazy things each day. Our Elf is named “Elfred” , my daughter gave him his name and these cookies were made for her because she is the one who loves to find him in the morning to see what he was up to.
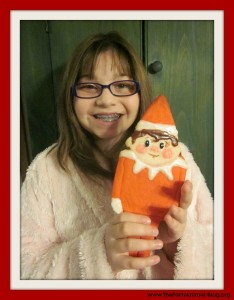
Being I was making these cookies for her I made them HUGE in size and you can make them much smaller of course. The recipe below is what I used and I made 3 cookies with it, again they are HUGE as you can see in the photo of her holding one at the bottom of the post. You can get more elves from the dough if you do not go as big as I did.
Here is the Sugar Cookie Dough Recipe I used:
- 3/4 Cup Butter Softened
- 1/2 Cup Sugar
- 1 1/2 Cups Flour
- 1 tsp Vanilla
- Red Food Coloring
For the Icing:
- 1/2 Cup Confectioners Sugar
- 2 Tbsp Milk
- Food Coloring: Red, Yellow, Orange, Blue, Black and Pink
- Toothpick
- Paintbrush
Now let me show how I created them:
Ok so let me tell you what I did in steps.
First I made my Sugar Cookie Dough and separated it –
1. I created a larger ball for my Red and smaller to use for the face and non red parts.
2. Then I colored the larger ball red with the food coloring.
3. This photo should have been at the end, BUT this is what your elf will look like before going in the oven – ops, my bad – too lazy to fix. (this pic should really be after 13)
4. I created this shape for the body freehand.
5. I added arms (Dough snakes)
6. Then I added hands using the non red dough.
7. Using a toothpick I made an indent for the legs.
8. Next I added his head.
9. Then I attached some ears, a nose and built him up some cheeks with extra dough.
10. Using the red dough I added his hat.
11. Then I created his collar by just attaching triangle shapes all the way around.
12. Finished the collar and added a rim to the hat with the regular dough. I also took the toothpick and made a mouth indent.
13. Just a duplicate picture – hmmm????
Bake your cookies at 350 for about 12 – 14 minutes of until done.
14. This is the Elf Cookie after he has baked getting decorated. I made my icing with the Confectioners Sugar and Milk. To add the icing I use a toothpick, but that is just how I do it – you can use any method that works for you. I used the icing as the white color to color his collar, hat rim and hands. Then I added the white for his eyes. I put a tiny bit aside to dot his eyes later – u only need to set aside a very tiny bit.
Next I turned the icing brown by mixing some red, orange, yellow and blue coloring together. I then made my elves hair. I used a tooth pick to add on eyebrows, eyelashes and used some in the mouth indent.
Next using just some black food coloring gel I added black in the eyes and doing the same with blue I added blue. When that dried I went back with the white and just added a highlight in the eyes.
And last I took some pink food coloring and mixed it with a tiny bit of water. I dipped a paint brush in and made his cheeks nice and rosey pink.
So that is how I did it and maybe you will be inspired to create some Elf on a Shelf Inspired Cookies too!!!
And this is what is all about – I think my daughter was happy with her HUGE Elf Cookie!!! Success!!
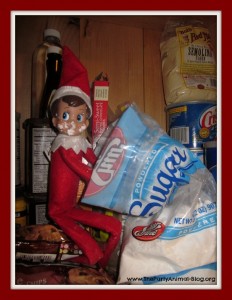
 Maybe our Elf on the Shelf was telling me something when I found him in my baking cabinet dipping in my sugar stash!!!
I think it was him who made me make cookies!! He better report my goodness to Santa so I can get some good gifts under the tree this year, just sayin’

UPDATE: Seems “Elfred” could not resist those cookies the night I made them and helped himself, NICE!!


These cookies are so cute. Thanks for telling us how you made them.